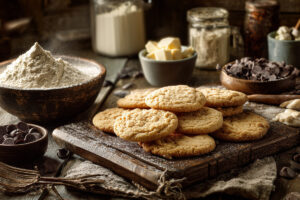
Fluffy, buttery biscuits made with powdered butter – no refrigeration required!
There’s something magical about fresh, warm biscuits that just makes any meal better. But here’s the problem: traditional biscuit recipes require cold butter, which means you need a refrigerator. That’s fine for your home kitchen, but what about when you’re camping, living in an RV, or dealing with a power outage?
That’s where these powdered butter biscuits come to the rescue. They deliver all the flaky, buttery goodness you want from a great biscuit, but using shelf-stable ingredients that travel anywhere. I’ve been perfecting this recipe for years, and it’s become my go-to for camping trips, emergency cooking, and those times when I want fresh biscuits but only have pantry ingredients.
The secret is in how you handle the powdered butter. Instead of reconstituting it first, you mix it directly into the flour, which creates these amazing pockets of rich flavor throughout the dough. The result? Biscuits that are incredibly tender, surprisingly buttery, and ready in about 20 minutes from start to finish.
Why This Recipe Works
Traditional biscuits get their flaky texture from cold butter chunks that melt during baking, creating steam pockets. With powdered butter, we achieve a similar effect by mixing the powder into the flour, then adding just enough liquid to hydrate everything properly. The powdered butter distributes evenly through the dough, giving you consistent flavor in every bite.
What makes these biscuits special:
- No cold butter needed – everything can be stored at room temperature
- Incredibly fluffy texture – rivals any traditional biscuit recipe
- Rich, buttery flavor – you’d never guess it wasn’t made with fresh butter
- Perfect for camping – all ingredients are shelf-stable and lightweight
- Emergency prep friendly – great use for your powdered butter storage
- Quick and easy – ready in 20 minutes with minimal cleanup
Ingredients
For the Dry Mix (can be pre-made and stored):
- 2 cups all-purpose flour
- 1/2 cup powdered butter
- 1 tablespoon baking powder
- 1 teaspoon salt
- 1 tablespoon sugar (optional, for slightly sweet biscuits)
For Assembly:
- 3/4 to 1 cup whole milk (or use 1/3 cup milk powder + 3/4 cup water)
- 2 tablespoons neutral oil (vegetable, canola, or melted coconut oil)
For Topping:
- 2 tablespoons powdered butter mixed with 2 tablespoons warm water
- Pinch of salt
Equipment You’ll Need:
- Large mixing bowl
- Wooden spoon or fork for mixing
- Measuring cups and spoons
- Baking sheet or cast iron skillet
- Clean kitchen towel
Instructions
Step 1: Prepare Your Dry Mix
In a large bowl, whisk together the flour, powdered butter, baking powder, salt, and sugar (if using). Make sure everything is evenly distributed – you don’t want clumps of powdered butter. This dry mix can be made ahead and stored in an airtight container for up to 3 months, making it perfect for camping or emergency prep.
Pro tip: If your powdered butter has any clumps, sift it through a fine-mesh strainer before adding to the flour. This ensures even distribution and better texture.
Step 2: Create Your Liquid Mixture
In a separate bowl or measuring cup, combine the milk and oil. If you’re using milk powder instead of fresh milk, whisk the powder into the water first, then add the oil. The liquid should be at room temperature – if it’s too cold, the oil might solidify and create lumps.
Step 3: Bring It Together
Pour the liquid mixture into the dry ingredients. Using a wooden spoon or fork, gently stir until the dough just comes together. Don’t overmix – you want to see some flour streaks and the dough should look slightly shaggy. Overmixing develops too much gluten, which makes tough biscuits.
What you’re looking for: The dough should hold together when gently pressed but still look a bit rough. If it seems too dry, add milk one tablespoon at a time. If it’s too wet, sprinkle in a little more flour.
Step 4: Shape Your Biscuits
Turn the dough out onto a lightly floured surface. Gently pat it into a rectangle about 3/4 inch thick. Don’t use a rolling pin – just use your hands to shape it. Cut straight down with a sharp knife or biscuit cutter, making 8-10 biscuits. Don’t twist the cutter, as this seals the edges and prevents the biscuits from rising properly.
Alternative shaping method: For camping or when you don’t have a flat surface, you can portion the dough directly from the bowl using a large spoon, making drop biscuits instead.
Step 5: Arrange for Baking
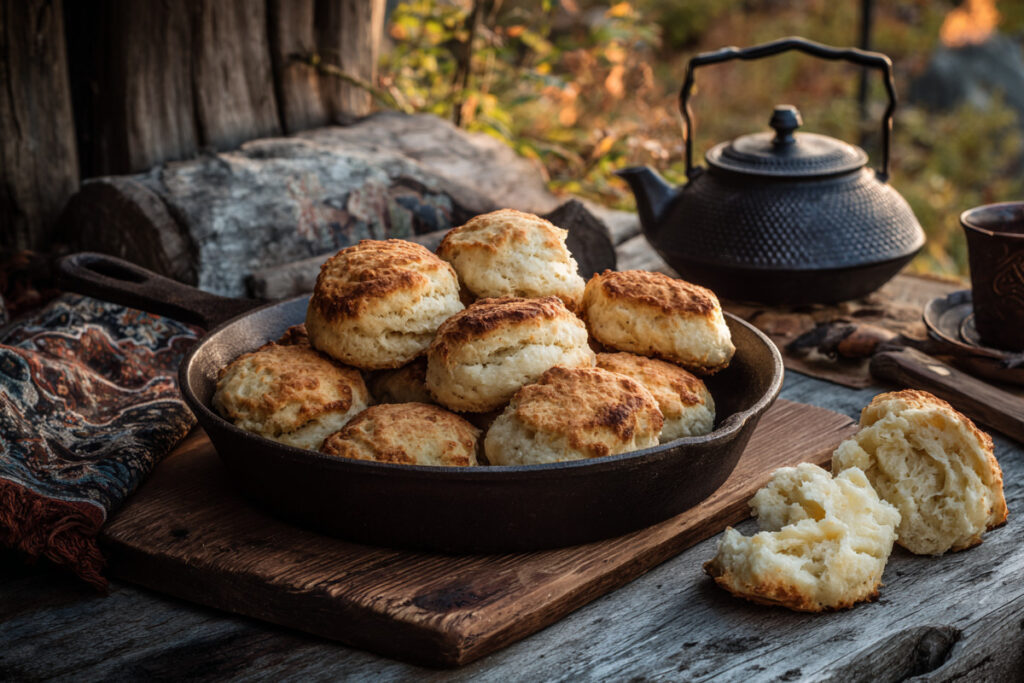
Place the biscuits on a lightly greased baking sheet or in a cast iron skillet, leaving about 1/2 inch between each biscuit. If you’re cooking over a campfire, a cast iron Dutch oven with coals on top and bottom works perfectly.
Step 6: Add the Butter Topping
Mix the 2 tablespoons of powdered butter with 2 tablespoons of warm water and a pinch of salt to create a thin butter wash. Brush this over the tops of the biscuits – it helps them brown beautifully and adds extra buttery flavor.
Step 7: Bake to Golden Perfection
For conventional oven: Bake at 425°F for 15-18 minutes, until the tops are golden brown and the biscuits have risen nicely.
For camping/Dutch oven: Use about 8-10 coals underneath and 16-18 coals on top for approximately 15-20 minutes. Check after 12 minutes and rotate if needed for even browning.
The biscuits are done when they’re golden brown on top and sound hollow when tapped on the bottom.
Serving Suggestions
These biscuits are incredibly versatile and work with just about anything:
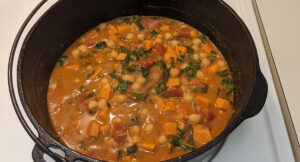
For breakfast: Split and serve with honey, jam, or reconstituted powdered butter mixed with herbs For dinner: Perfect alongside chili, stew, or barbecue For camping: Great with scrambled eggs, bacon, or as a base for breakfast sandwiches For snacking: Delicious on their own or with a drizzle of honey
Storage and Reheating
Fresh biscuits will stay good covered at room temperature for 2-3 days. For longer storage, wrap individually and freeze for up to 3 months.
To reheat: Wrap in a damp paper towel and microwave for 15-20 seconds, or warm in a 350°F oven for 5-7 minutes.
Make-ahead tip: You can mix the dry ingredients and store them in an airtight container for months. When you’re ready to bake, just add the liquid ingredients and follow the recipe.
Camping and Emergency Prep Notes
This recipe is perfect for situations where fresh ingredients aren’t available:
For camping: Pre-mix all dry ingredients at home and store in a sealed container. At camp, just add liquid and bake in your Dutch oven or camp stove.
For emergency prep: All ingredients are shelf-stable. If you don’t have fresh milk, use milk powder – the results are nearly identical.
High-altitude adjustments: Above 5,000 feet, reduce baking powder to 2 teaspoons and increase liquid by 2-3 tablespoons.
Variations to Try
Cheesy biscuits: Add 1/2 cup shredded cheese to the dry mix Herb biscuits: Mix in 1 tablespoon dried herbs (rosemary, thyme, or sage work great)
Sweet biscuits: Increase sugar to 3 tablespoons and add 1 teaspoon vanilla extract
Garlic butter biscuits: Add 1 teaspoon garlic powder to the dry mix and brush tops with garlic butter wash

Ultimate Powdered Butter Biscuits
Equipment
- Large mixing bowl
- Measuring cups and spoons
- Baking sheet or cast iron skillet
- Wooden spoon
Ingredients
For the Dry Mix
- 2 cups all-purpose flour
- 1/2 cup powdered butter
- 1 tablespoon baking powder
- 1 teaspoon salt
- 1 tablespoon sugar optional, for slightly sweet biscuits
For Assembly
- 3/4 cup whole milk to 1 cup as needed, or use 1/3 cup milk powder + 3/4 cup water
- 2 tablespoons neutral oil vegetable, canola, or melted coconut oil
For Topping
- 2 tablespoons powdered butter for butter wash
- 2 tablespoons warm water for butter wash
- 1 pinch salt for butter wash
Instructions
- Preheat your oven to 425°F (220°C). If using a cast iron skillet, place it in the oven while preheating.
- In a large bowl, whisk together the flour, powdered butter, baking powder, salt, and sugar (if using). Make sure everything is evenly distributed with no clumps of powdered butter. If your powdered butter has clumps, sift it through a fine-mesh strainer first.
- In a separate bowl or measuring cup, combine the milk and oil. If using milk powder, whisk it into the water first, then add the oil. The liquid should be at room temperature.
- Pour the liquid mixture into the dry ingredients. Using a wooden spoon or fork, gently stir until the dough just comes together. Don’t overmix – you want to see some flour streaks and the dough should look slightly shaggy. If too dry, add milk one tablespoon at a time.
- Turn the dough out onto a lightly floured surface. Gently pat it into a rectangle about 3/4 inch thick using your hands – don’t use a rolling pin. Cut straight down with a sharp knife or biscuit cutter to make 8-10 biscuits. Don’t twist the cutter as this seals edges and prevents proper rising.
- Place biscuits on a lightly greased baking sheet or in the preheated cast iron skillet, leaving about 1/2 inch between each biscuit.
- For the butter wash, mix 2 tablespoons powdered butter with 2 tablespoons warm water and a pinch of salt until smooth. Brush this mixture over the tops of the biscuits for extra browning and flavor.
- Bake for 15-18 minutes, until the tops are golden brown and the biscuits have risen nicely. They should sound hollow when tapped on the bottom.
- Serve immediately while warm. These are perfect with honey, jam, or additional reconstituted powdered butter.
Notes
Troubleshooting Common Issues
Biscuits are too dense: You likely overmixed the dough or used too much liquid. Mix just until ingredients come together.
Biscuits didn’t rise: Check your baking powder expiration date, and make sure you’re not twisting your cutter when shaping.
Dry or crumbly texture: Add a bit more liquid next time, or make sure your powdered butter is fresh.
Not enough butter flavor: Increase powdered butter to 3/4 cup, or brush tops with more butter wash before baking.
Nutrition Information
Per biscuit (makes 10):
- Calories: 185
- Fat: 6g
- Carbohydrates: 28g
- Protein: 5g
- Sodium: 380mg
The Bottom Line
These powdered butter biscuits prove that you don’t need fresh butter to make incredible biscuits. They’re perfect for camping trips, emergency cooking, or anytime you want fresh-baked comfort food without the hassle of keeping butter cold.
The beauty of this recipe is its flexibility – you can make the dry mix ahead for convenience, adjust the flavors to your taste, and bake them anywhere you have heat. Once you try these, you’ll understand why powdered butter deserves a permanent spot in your pantry.
Ready to explore more powdered butter recipes? Check out our Complete Powdered Butter Bible for storage tips, buying guides, and 25+ more ways to use this versatile ingredient!
Frequently Asked Questions
Can I make these without milk? Yes! Use water instead, but add an extra tablespoon of oil for richness. You can also use any non-dairy milk.
How do these compare to regular butter biscuits? They’re remarkably similar in texture and flavor. You’d be hard-pressed to tell the difference, especially when served warm.
Can I double this recipe? Absolutely. Just double all ingredients and bake in batches if needed.
What if I don’t have powdered butter? You can make a version with regular butter by cutting 1/2 cup cold butter into the flour mixture, but you’ll lose the convenience factor that makes this recipe special.
How long does the dry mix last? Stored in an airtight container, the dry mix will keep for 3-6 months at room temperature.
Have you tried these powdered butter biscuits? I’d love to hear how they turned out! Drop a comment below with your results, variations, or any questions about the recipe.