I used to think a mortar and pestle was just fancy kitchen decoration – you know, something that looked cool on the counter but served no real purpose in my actual cooking life. I mean, why would I need this ancient-looking rock when I had a perfectly good electric spice grinder sitting in my cabinet?
Let me ask you this, you are trying to grind spices and make Thai green chili paste. What tool do you use? Coffee grinder? Blender? Food processor? None of those will do the whole job, or do it particularly well.
That is why we have the time tested mortar and pestle.
The Reality Check: What Most People Get Wrong About Grinding Spices
Here’s what I wish someone had told me years ago: crushing and grinding are completely different things. When you grind spices in an electric grinder, you’re basically creating powder. When you crush them in a mortar and pestle, you’re breaking down the cell walls and releasing all those flavorful oils while maintaining texture.
I learned this the hard way when I made what I thought would be an amazing coriander-crusted salmon. Used my trusty electric grinder, got perfect powder, and… the fish tasted like cardboard. Turns out, grinding coriander into dust kills most of its citrusy punch. Crushing it releases those oils and gives you bursts of actual flavor.
Plus, let’s talk about cleanup. My electric grinder takes longer to clean than it does to actually crush spices in a mortar and pestle. And don’t get me started on trying to get garlic smell out of that plastic container.
The Game-Changing Uses (That Go Way Beyond Crushing Garlic)
Spices and Aromatics That Actually Taste Like Something
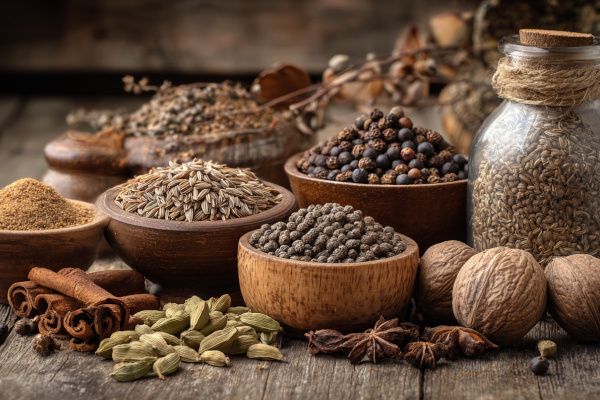
Whole spices are where this thing really shines. Pre-ground cumin from a jar tastes like dirt compared to cumin seeds you just crushed yourself. Same goes for coriander, peppercorns, and cardamom. The difference isn’t subtle – it’s like switching from black and white TV to 4K.
Custom spice blends become your superpower. Want to make your own curry powder that doesn’t taste like generic yellow dust? Mortar and pestle. Za’atar that actually has personality? You got it. I’ve got a signature BBQ rub now that started with me just messing around crushing different spices together.
Garlic and ginger paste – this is where you’ll really feel smug about your purchase. Getting that smooth, paste-like consistency is impossible with a knife, and food processors turn everything into chunky mush. A mortar and pestle gives you that restaurant-quality paste that dissolves beautifully into sauces.
Pastes and Sauces That Don’t Come From a Jar
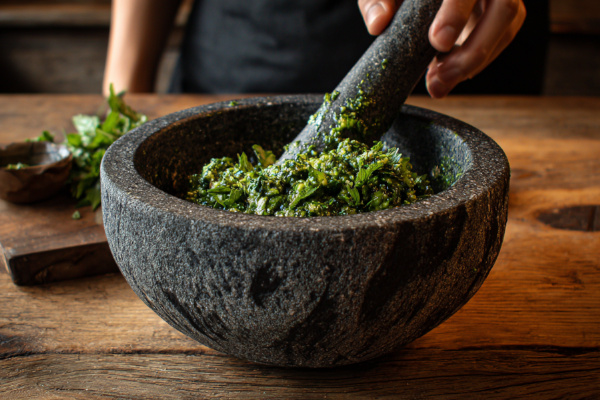
Thai curry pastes – I cannot stress this enough: if you want to make real Thai food, you need one of these. Food processors don’t have the patience for the slow, methodical crushing that develops the right texture and flavor. Your pad thai will thank you.
Mexican salsas – Salsa verde made in a mortar and pestle has this incredible chunky-smooth texture that’s impossible to replicate. Plus, you can control exactly how much you crush each ingredient.
Fresh pesto – Forget the food processor blade chopping your basil into green mush. Crushing basil leaves releases the oils without bruising them. The difference in color and flavor is dramatic.
Salts and Rubs That Actually Stick
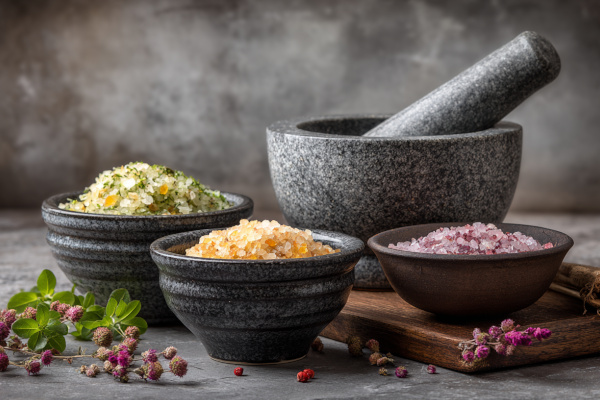
Flavored salts are stupidly easy and make you look like a culinary genius. Crush some rosemary with coarse salt, and suddenly your roasted potatoes are restaurant-level. Lemon zest salt on fish? Game changer.
Dry rubs work better when the spices are crushed to different sizes rather than uniformly ground. You get these little flavor bombs that hit your taste buds at different times.
Why Size Actually Matters (And What Size You Should Actually Buy)
The Sweet Spot: 6-8 Inch Diameter
After trying everything from tiny decorative ones to monsters that could crush a small child, I’ve landed on 6-8 inches as the perfect size for most home cooks. It’s big enough to make a full batch of pesto or curry paste, but not so massive that storing it becomes a problem.
You can crush a single garlic clove or a cup of spices with equal ease. It fits on most counters without dominating your workspace, and you can actually lift it without throwing out your back.
Skip the Tiny Ones (Seriously)
Those cute 3-4 inch mortars you see at fancy kitchen stores? They’re basically expensive paperweights. I bought one thinking it would be perfect for small jobs, but crushing even two garlic cloves becomes an exercise in frustration. Save your money and your sanity.
The Big Boys Aren’t Worth It (Usually)
Unless you’re cooking for a small army or planning to open a Thai restaurant, those 10+ inch monsters are overkill. They’re expensive, take up serious counter space, and honestly, the 6-8 inch size handles even large jobs just fine if you work in batches.
Material Matters: Don’t Get Scammed by Pretty Marble
Granite: The Gold Standard
Granite is dense, hard, and non-porous. It won’t absorb flavors, won’t chip easily, and has enough weight to stay put while you work. The rough texture helps grip whatever you’re crushing. This is what you want.
Look for mortars that feel substantial – cheap granite will be lightweight and smooth. You want something that makes you grunt a little when you lift it.
Marble: Pretty but Problematic
Marble looks gorgeous on Instagram, but it’s softer and more porous than granite. It stains easily (especially if you’re crushing turmeric or other colorful spices), and the smooth surface doesn’t grip ingredients as well.
If aesthetics are more important to you than function, fine. But don’t say I didn’t warn you when your beautiful white marble mortar looks like a tie-dye experiment after a few months.
Stainless Steel: Looks Professional, Works Okay
Stainless steel mortars look sleek and modern, and they’re definitely easier to clean than stone. They’re also lighter, which some people prefer. But here’s the thing – they’re too smooth.
That smooth surface means ingredients tend to slip around rather than getting properly crushed. You’ll find yourself chasing peppercorns around the bowl instead of breaking them down. Plus, they’re loud as hell – every crush sounds like you’re beating on a metal drum.
They work fine for soft stuff like garlic or herbs, but for anything that needs real crushing power, you’ll be fighting the tool instead of working with it.
What to Avoid Completely
Wooden mortars – just no. Wood absorbs everything and is impossible to properly clean.
Lightweight options – if it slides around your counter while you’re using it, it’s useless.
Poorly fitted pestles – the pestle should fit the curve of the mortar perfectly. If there are gaps, you’ll never get a proper crush.
Addressing Your Actual Concerns (Because I Had Them Too)
“Isn’t This Just Making More Work for Myself?”
Look, I get it. We live in the age of convenience, and I’m telling you to go backwards to manual labor. But hear me out.
Crushing spices in a mortar and pestle takes about 30 seconds. Cleaning it takes another 30 seconds – just rinse and scrub with a brush. Compare that to dragging out your food processor, dealing with multiple parts, and scrubbing paste out of plastic crevices for five minutes.
The real question is: do you want food that tastes amazing, or food that’s convenient? Sometimes you can have both.
“Where the Hell Do I Store This Thing?”
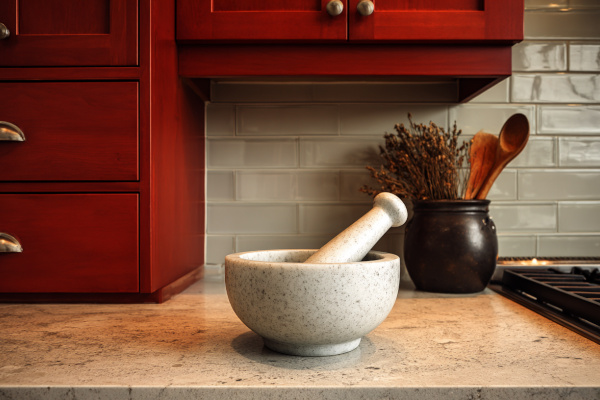
Counter space, my friend. I know it’s precious real estate, but this is one of those tools that earns its spot. Plus, keeping it visible means you’ll actually use it.
If counter space is absolutely impossible, store it in a cabinet near your stove. But seriously, consider making room. It’s more useful than half the gadgets taking up space on your counter right now.
“Cleaning Seems Like a Nightmare”
Seasoning a new one: Rinse it, crush some white rice until the powder comes out clean, then rinse again. Done. This removes any stone dust from manufacturing.
Regular cleaning: Rinse with water, scrub with a brush, dry. Seriously, that’s it. The stone doesn’t hold onto flavors like plastic does.
Stubborn stains: Crush some coarse salt with water to make a paste, scrub, rinse. For really stubborn stuff, add some rice to the salt mixture.
Don’t use soap unless absolutely necessary, and never put it in the dishwasher. The stone is porous enough that soap can get trapped and affect the taste of your food.
My Actual Recommendations (With Real Prices and Links)
[IMAGE: Product shots of each recommended mortar and pestle, preferably in use]
My Pick: PriorityChef Heavy Duty Extra Large Mortar and Pestle (7-Inch, 4-Cup)
Price Range: $20-25
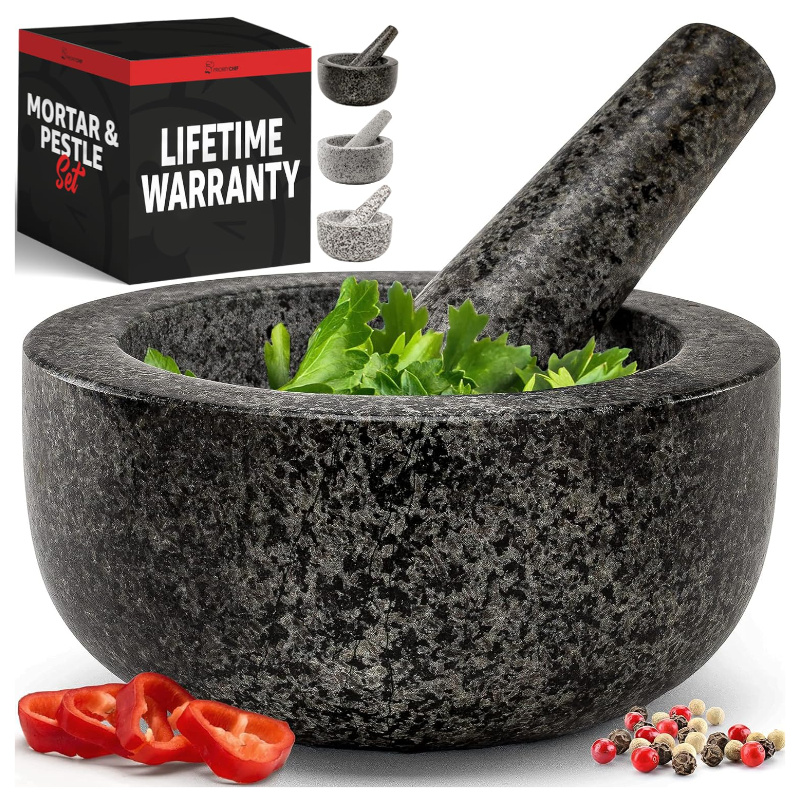
Yes, I know, I said a 6″ is the perfect size, but as a Redneck, bigger is always better and I like to cook a lot, and make big portions. The 4 cup capacity is really nice to have and the more vertical sides help keep food inside.
Even with the larger capacity, it still handles small jobs perfectly. Crushing a single garlic clove doesn’t get lost in there like I worried it would.
The granite is hand-carved and polished on the outside with an unpolished interior that provides perfect grinding texture. At 5.3 kg (nearly 12 pounds), this thing has serious heft – it stays put no matter what you’re crushing. The 6.9-inch pestle fits the curve perfectly and has enough weight to do most of the work for you.
What pushes this into “my pick” territory are the thoughtful details: it comes with non-slip countertop protectors (essential with something this heavy), plus comes with a silicone garlic peeler as a bonus. The polished black exterior looks absolutely gorgeous on the counter – this is one kitchen tool that earns its permanent display spot.
This mort takes up real estate, and you’ll definitely want to keep it accessible because hauling it in and out of cabinets gets old fast. But if you have the counter space and cook regularly, this is the mortar and pestle that handles everything from daily garlic crushing to weekend projects with equal ease.
Budget Pick: Gorilla Grip Heavy Duty Granite Mortar and Pestle (5.2-Inch)
Price Range: $20-25
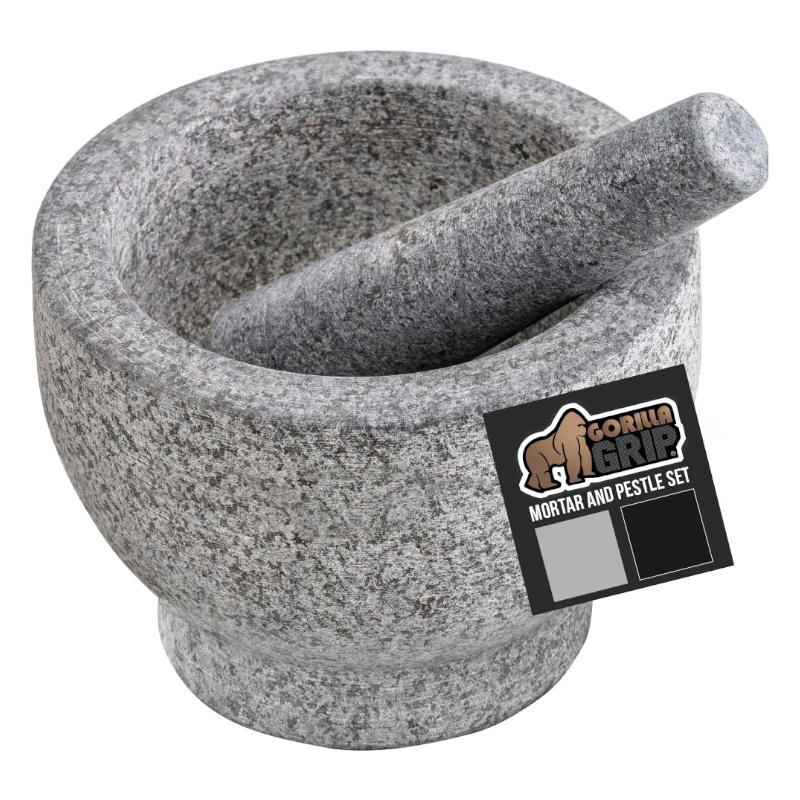
This is the budget winner that doesn’t feel like you’re compromising. The Gorilla Grip set punches way above its weight class – it’s 100% granite, weighs nearly 4 pounds, and comes with a slip-resistant foam base that actually works.
At 5.2 inches, it’s slightly smaller than my ideal recommendation, but for most home cooks, this size handles everything from crushing a few peppercorns to making a decent batch of guacamole. The 1.5-cup capacity is perfect for small to medium jobs.
What really sold me on this one is the attention to practical details. That foam base isn’t just marketing fluff – it genuinely keeps the mortar from sliding around and protects your countertops. The granite has good texture for gripping ingredients, and the pestle fits the curve properly.
You’re giving up some of the premium feel and perfect sizing of more expensive options, but for someone testing the mortar and pestle waters, this gives you 90% of the experience for a few less dollars.
Splurge Option: IMUSA Traditional Mexican Molcajete (8.5-Inch)
Price Range: $35-50
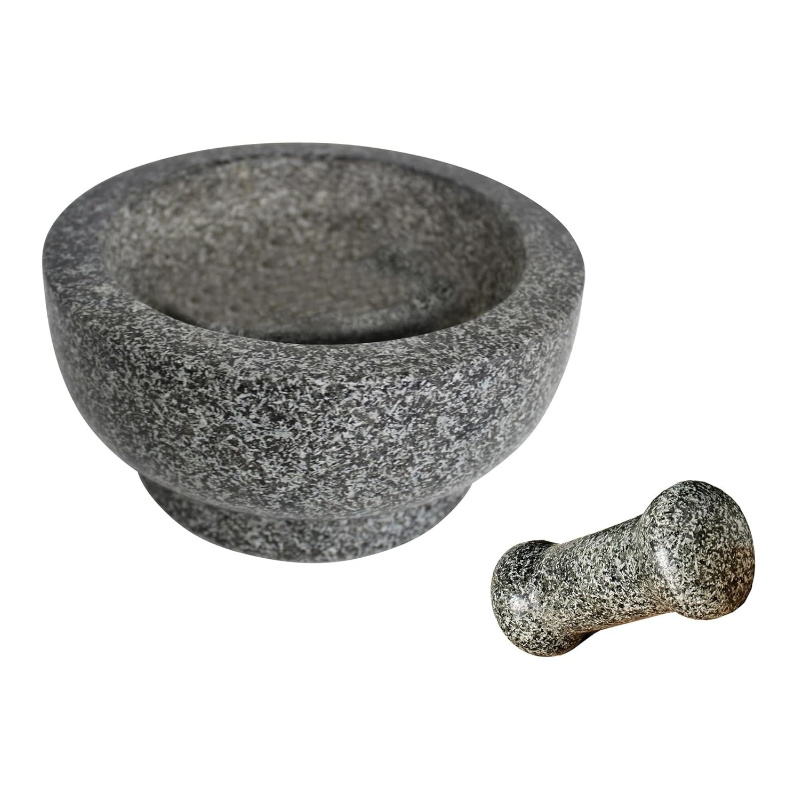
If you’re serious about Mexican cooking or just want something that will outlast you, this is it. Made from volcanic rock, it’s incredibly durable and has perfect texture for crushing. It’s larger than my daily recommendation, but if you frequently cook for groups, the extra capacity is worth it.
Fair warning: this needs serious seasoning (expect to go through a lot of rice), but once it’s broken in, it’s absolutely perfect.
Essential Accessories
Mortar and Pestle Brush: You’ll want a dedicated brush for cleaning. Stiff bristles work best. Natural Bristle Cleaning Brush
Digital Scale: If you’re getting serious about spice blends, measuring by weight rather than volume makes a huge difference. Be sure to get one that is highly accurate since your spices don’t weigh that much! Digital Spice Scale
Your First Week: Getting Started Without Screwing It Up
Easy Wins for Beginners
Day 1: Fresh cracked pepper – Start here. Buy whole peppercorns, crush about a teaspoon at a time. Once you taste freshly cracked pepper, that pre-ground dust will never cut it again.
Day 3: Garlic paste – Take 2-3 cloves, crush them with a pinch of salt. The salt acts as an abrasive and helps break down the garlic. You’ll get a smooth paste that dissolves beautifully into whatever you’re cooking.
Day 5: Simple spice blend – Crush equal parts cumin seeds, coriander seeds, and peppercorns. Toss with olive oil and roasted vegetables. Prepare to feel very smug about your cooking skills.
Weekend project: Basic pesto – Start with basil, garlic, pine nuts, and a little salt. Crush it all together slowly. Add olive oil gradually. Don’t rush it – this is meditative cooking at its finest.
Mistakes Everyone Makes (And How to Avoid Them)
Too much force too fast – Let the weight of the pestle do most of the work. You’re not trying to demolish concrete.
Wrong technique – Use a twisting, grinding motion rather than just pounding up and down. Think of it like you’re painting with a really heavy brush.
Not cleaning between sessions – Rinse out between different recipes or you’ll end up with weird flavor combinations.
The Bottom Line: Why This Actually Changes Your Cooking
After six months of regular use, here’s what I can tell you: this isn’t just about being fancy or traditional. It’s about flavor. Real, noticeable, “holy crap what did you do differently” flavor.
Your spice cabinet will become more interesting because whole spices stay fresh longer than pre-ground. You’ll start making your own spice blends because it’s easier than you thought. You’ll actually taste the difference in your cooking, and so will everyone else.
Plus, there’s something satisfying about the process. In our world of beeping appliances and instant everything, there’s something grounding about the simple act of crushing spices by hand. It connects you to what you’re cooking in a way that pressing a button never will.
Your Challenge (And My Promise)
Here’s what I want you to do: pick one recipe this week that calls for ground spices. Instead of using the pre-ground stuff, buy the whole spices and crush them yourself.
I promise you’ll taste the difference. And if you don’t, well, you’ve got a really expensive paperweight that looks good on your counter.
Use it at least once a week for a month. By the end of that month, it’ll have earned its permanent spot in your kitchen arsenal.
What’s Next?
I’d love to hear about your first mortar and pestle success story – drop a comment below and let me know what you crushed first and how it turned out.
Got questions about specific techniques or wondering how to tackle a particular recipe? Ask away. I’ve probably screwed it up at least once and learned the hard way.
Disclosure: This post contains affiliate links. If you buy something through these links, I earn a small commission at no extra cost to you. I only recommend stuff I actually use and believe in – life’s too short for crappy kitchen tools.